Monday, April 15, 2013

A Hearty Lasagna...That's Gluten Free AND Vegetarian?! Say It Ain't So...

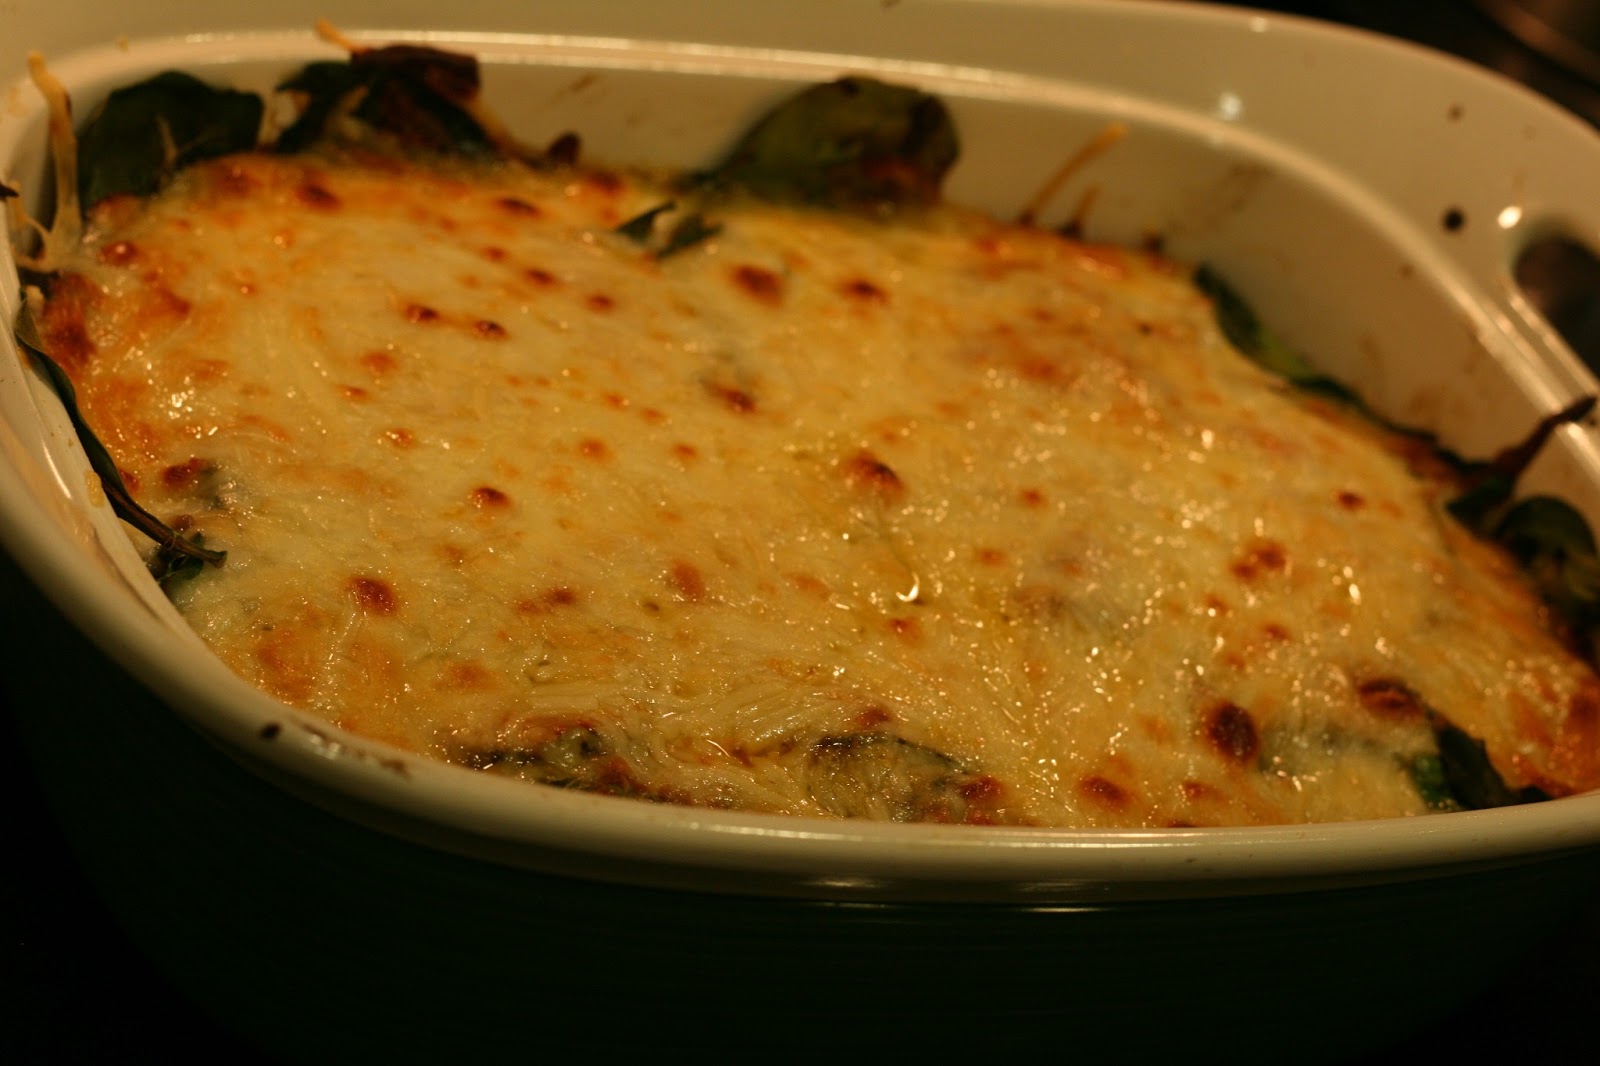
Oh but it IS! Yes, I made a quinoa "lasagna"! And while it didn't really hold the shape of a normal lasagna, it's better than any lasagna I've ever attempted, as I am the ultimate ruiner of this sacred, staple dinner dish for many Americans (and maybe Italians!?).

I even implemented a little here in there, as it was Sunday night and I was in no mood to run to the grocery store. So I got resourceful and made a few tweaks and it came out delicious!


Hearty, flavorful, satisfying...it's everything you want in a lasagna and any Italian comfort dish, really, but without the mounds of cheese, carb overloading and unsavory heaviness.

Did I mention that my kitchen is nearly finished?! Hell, yeah I used that island to prep and make DESSERT alongside my main dish. Oh this was all after several hours (and days!) of IKEA hell, putting together flimsy (but affordable) furniture. Alas, a little cooking and baking really made my Sunday just that much better. A few snapshots of the fruits of my other labor...IKEA furniture!

I have more shoes than pictured above...yikes!
Was too tired from the night before to assemble this lone bar stool!
 I was also itching to bake something posted by the famed Smitten Kitchen, making her oh so fluffy and light grapefruit yogurt loaf has been on my to-do for weeks!


My new kitchen island is now my Instagram studio :)
I digress. I love this dish and want to keep improving the recipe, because you can literally add anything and everything to it, but the kitchen sink!

Enjoy with a glass of red...well, that's what I did :)

Vegetarian Quinoa Lasgana


adapted from EatingWell

Ingredients: 

  • 1 cup quinoa, cooked to package instructions
  • 2 zucchinis, sliced
  • 1/2 red onion, diced
  • 1 cup mushrooms, sliced
  • 1 cup spinach leaves
  • 2-3 cloves of garlic, minced
  • 2 cups of your favorite tomato sauce ( I only had vodka sauce, ha! It was pretty amazing, but a bit heavier than tomato sauce)
  • 1 tsp dried oregano
  • 1 tsp dried basil
  • 1/2 cup cottage cheese
  • Sprinkle of Parmesan and shredded mozzarella cheese
  • Pepper to taste
  • Olive oil
Directions:

1. Preheat oven to 350 degrees. Lightly grease casserole dish with cooking spray or a bit of olive oil. Set aside.
2.  Prepared quinoa to package instructions, set aside for assembling later. 
3.  In a large skillet, heat 1 Tbl. olive oil on medium heat and add diced onions. Cook for 5-6 minutes or until translucent and soft. Add in mushrooms and zucchini and cook for additional 4-5 minutes until all of the vegetables are soft. 


4.  In a saucepan, heat up 2 cups of sauce and add dried herbs, garlic and pepper. Heat until sauce is warm. 


5. Begin assembling your lasagna!
6. In the oiled casserole dish, layer all of the qunioa and smooth out with the back of your spoon. 


7. Add 1/3 of the sauce (eyeball this, it doesn't have to be perfect!) and smooth evenly as well. 
8. Next, add your cooked veggies and cottage cheese. 


9. Then top with another 1/3 of sauce, spread evenly. 
10. Add spinach and top with remaining sauce. Sprinkle about 1/4 cup grated Parmesan and 1/4 cup of shredded mozzarella.

11. Bake uncovered for 30-40 minutes, or until cheese on top is melted and slightly browned. Let stand for 10 minutes to let all the ingredients set, before serving! Serves about 6-8 really hungry people.
Tuesday, April 9, 2013

Indian Lite Series: Sometimes a Little Masala Does the Trick

No seriously,turmeric, garam masala, chaat masala, curry powder, they are all just wonderful. They add vibrant and complex flavors to so many non-Indian dishes, it really does the trick when it comes to satisfying that Indian craving.

Wait, do any of you get that craving for Indian food?? The craving usually hits me on a terribly, rainy San Francisco day; hot, piping Indian food always hits the spot! (Dosa in particular!) Here's my fav spot to eat at on the cheap!

But sometimes, actually, almost always, I feel like the Indian food that doesn't come straight from my mom's kitchen, is generally, just too heavy, too flavorful (!?), too rich and frankly a waste of $$$.

So how do I get to heart of all the wonderfully filling, complex and warm Indian flavors I crave, without the calories and extra cash?

Ahem...ladies and gentleman, I call it Indian Lite.


Not only is the dish below (along with the next few posts), light, healthy and fresh, but it's "lite" on the masala (you know, that intense, curry flavoring in all Indian foods). It doesn't have to be" lite" on the mirch (spiciness)... well unless you can't handle the heat!

I'd have to agree that, sometimes, Indian food calls for some irregular and odd ingredients, so I've designed and consulted (with some help!), a handful of recipes that posses the very essence of Indian cooking, without the hassle, heaviness after consuming, and curry fingers (no joke...all y'all who eat with your hands know what I mean by that!)

Big shout out to my bestie in Boston, Grace, she's the inspiration for this series and this is a recipe she, generously, passed on to me!

Curry Chickpea Quinoa Lettuce Wraps with Masala Yogurt Dressing


Ingredients: 
Check out the spice rack. IKEA DIY cred here!
  • 1 cup quinoa, cooked to package instructions
  • 1 can chickpeas (also known as garbanzo beans), rinsed and drained
  • 1 tomato, diced
  • 1/2 red onion, diced
  • 1/2 tsp of minced garlic
  • 1 zucchini, diced
  • 1 tsp curry powder
  • 1/2 tsp chili powder
  • Salt and pepper to taste
  • Olive oil (about 1 1/2 Tbl.)
  • 1 head of bibb lettuce of iceberg lettuce (these leaves make for great "cups")
  • 2 - 3 Tbl. plain yogurt (or plain Greek yogurt)
  • splash of milk
  • Garam Masala
Directions:
  1. Pull apart lettuce leaves. Wash and dry lettuce, be sure to remove all the water by dabbing lettuce with paper towels and letting them dry, even more, while cooking.
  2. In a small bowl combine yogurt, a splash of milk (to make it more runny and like a dressing), salt pepper, a pinch of garam masala and chili powder, all to taste.

3.  Get your quinoa is post and start cooking! While the quinoa is cooking, saute red onions, garlic and zucchini over medium heat, until soft and translucent, about 5-7 minutes. 

When quinoa is done, fluff with a fork!


4.   Add in your drained chickpeas, curry powder, chili powder, salt and pepper. 


5.   Cook this for about 4 minutes, then add in cooked quinoa.


6.   Cook for another few minutes on medium heat and top with tomatoes.


7.    Spoon in about 2-3 Tbl. of chickpea quinoa mixture into lettuce leaves. Drizzle with yogurt dressing.
Serve warm, room temp or cold!

Wednesday, March 27, 2013

The Paleo Push: Even 24 Year-Olds Need More Energy!

Aloha!? Hello?! Guess, who's back? This is gal is refreshed and ready to really ramp things up...in the kitchen of course. Of the last month or so I've been lagging on posts because my kitchen has been "under construction", so to speak. Literally pulled spices out of a canvas bag because we no longer have any shelving. Oh, did I mention I don't have a kitchen table either?? With limited prep space, it's challenging/daunting to even try and attempt to cook multiple nights a week.

Needless to say I've started to really appreciate having leftovers to munch on days after! Excuses aside... cooking is like stretching for me...I need to chop, dice, saute  bake and EAT to it's a long-term commitment I need to keep up with to live a balanced and happy life!

It's funny because this article was just published today by one of my fav online publications, The Bold Italic, and as much as it poke fun at the Paleo "diet", I like that to believe that the Paleo lifestyle is trying to accomplish several things:

1. Making people think about energy differently:  Paleo is devout to its proteins (and no not the lame powder, but the real stuff like MEAT and NUTS!)

2. Regularly engaging in high intense workouts (not necessarily lengthy workouts): Incorporating protein as a form of  long-term energy, rather than relying on carbs or short term (i.e. grains, lentils and some fruits), Paleo lovers are all about their Crossfit, PX90 etc. to burn off , all those fats you are allowed to eat (ahem, bacon fat!). Let me just say I love my Zumba, runs and weight training, so I'm not trying to adhere to the Paleo diet strictly here, because I can't really work off that bacon fat with some samba footwork once a week! I mean let's the be real right!?

Going Paleo 100% takes discipline, effort and frankly some support from local gym goers, friends, family etc., that are also doing Paleo.

So I've made a choice to try (operative word there), to eat Paleo at home, where I can cook my meals and not sweat it when I go out for dinner on a Friday, brunch on Sunday, or have the occasional marg on Tuesdays. I'm also down for more energy to do things I love...like cooking!

Here's the very, basic low down on what the Paleo diet is, which actually lends it to be a quite versatile eating lifestyle:

  • Grass-fed meats (leaner the better, always), Seafood
  • Nuts (but not peanuts!)
  • Eggs
  • Limited oils (coconut oil, olive oil) and natural fats (like one's that come from the meat you are cooking!)
  • Vegetables, Root vegetables (sweet potatoes are a-okay!)
  • Fruits (contested by Paleo followers, but berries are a safe bet, since they contain the least amount of natural sugar)

No sugar, processed/refined foods, dairy, legumes, gluten-products or grains!

Yep, you got this!! Be strong, boost your energy with this tasty recipe below. 

Mexican Chicken Stew Over Cauliflower, Garlic, Lime "Rice"


Ingredients:
Check out that rice! Unlike the real stuff this will fill you up, so portion control it. 
  • 2 large chicken breasts
  • 1 (8 oz.) can diced tomato
  • 1 (8 oz.) can tomato sauce
  • 1/2 yellow onion, sliced
  • 1 red pepper, sliced
  • 1 yellow squash, sliced
  • 1 tsp cumin
  • 1/2 tsp chili powder
  • 4-5 cloves of garlic, minced
  • 1 tsp salt
  • 1 tsp onion powder
  • 1 tsp oregano
  • Olive oil
For cauliflower rice: 
  • 1 head of cauliflower, chopped and then baked
  • juice of 1 lime
  • 1/2 cup cilantro, chopped
  • Pepper to taste
Directions:

1. Spread head of chopped cauliflower (also known as florets , even onto a baking sheet. Drizzle 1 tsp of olive oil and a pinch of salt over florets. Bake for 400 degree for about 20-25 minutes.


2. While cauliflower is baking, in a large saute pan, heat 1 Tbl. of olive oil at medium heat. Once oil is heated. Add onions, garlic, peppers and squash and saute until slightly soft, about 3-4 minutes. 

3. Make room in the pan for chicken breasts and cook, on each side, for 3 minutes. 

Quick Tip! Grate fresh garlic cloves rather than mince with a knife, it's a fast and easy shortcut!
4. Add diced tomatoes, tomatoes sauce and spices, turn up heat to a boil. 


5. Once chicken in the sauce is starting to boil, reduce heat to a simmer and cover with the lid. Let the chicken simmer in the sauce for about 30-35 minutes or until chicken is completely cooked (usually at 180 degrees, it's totally cooked!)

6. Once chicken is fully cooked, removed from heat onto a cutting board and shred chicken with two forks. 

7. Return shredded chicken into the simmering sauce, and continue cooking chicken, but now at medium heat for about 5 minutes. The chicken should begin absorbing some of the sauce, but don't worry if it's still kind of stew-y. Serving piping hot over cauliflower "rice" and sliced avocado! Serves about 6 hungry passionate Paleos!

For cauliflower rice:

1. Place baked cauliflower florets into a food processor along with chopped cilantro. Pulse (do not hold down and blend) cauliflower a few times until it looks like grains of "rice". 


2. Transfer to plate and squeeze lime juice over rice. Stir in raw (or you could cook in a little olive oil) two cloves of minced garlic. 

3. Sprinkle some pepper for added flavor!


Wednesday, March 13, 2013

Mastering the Turkey Burger

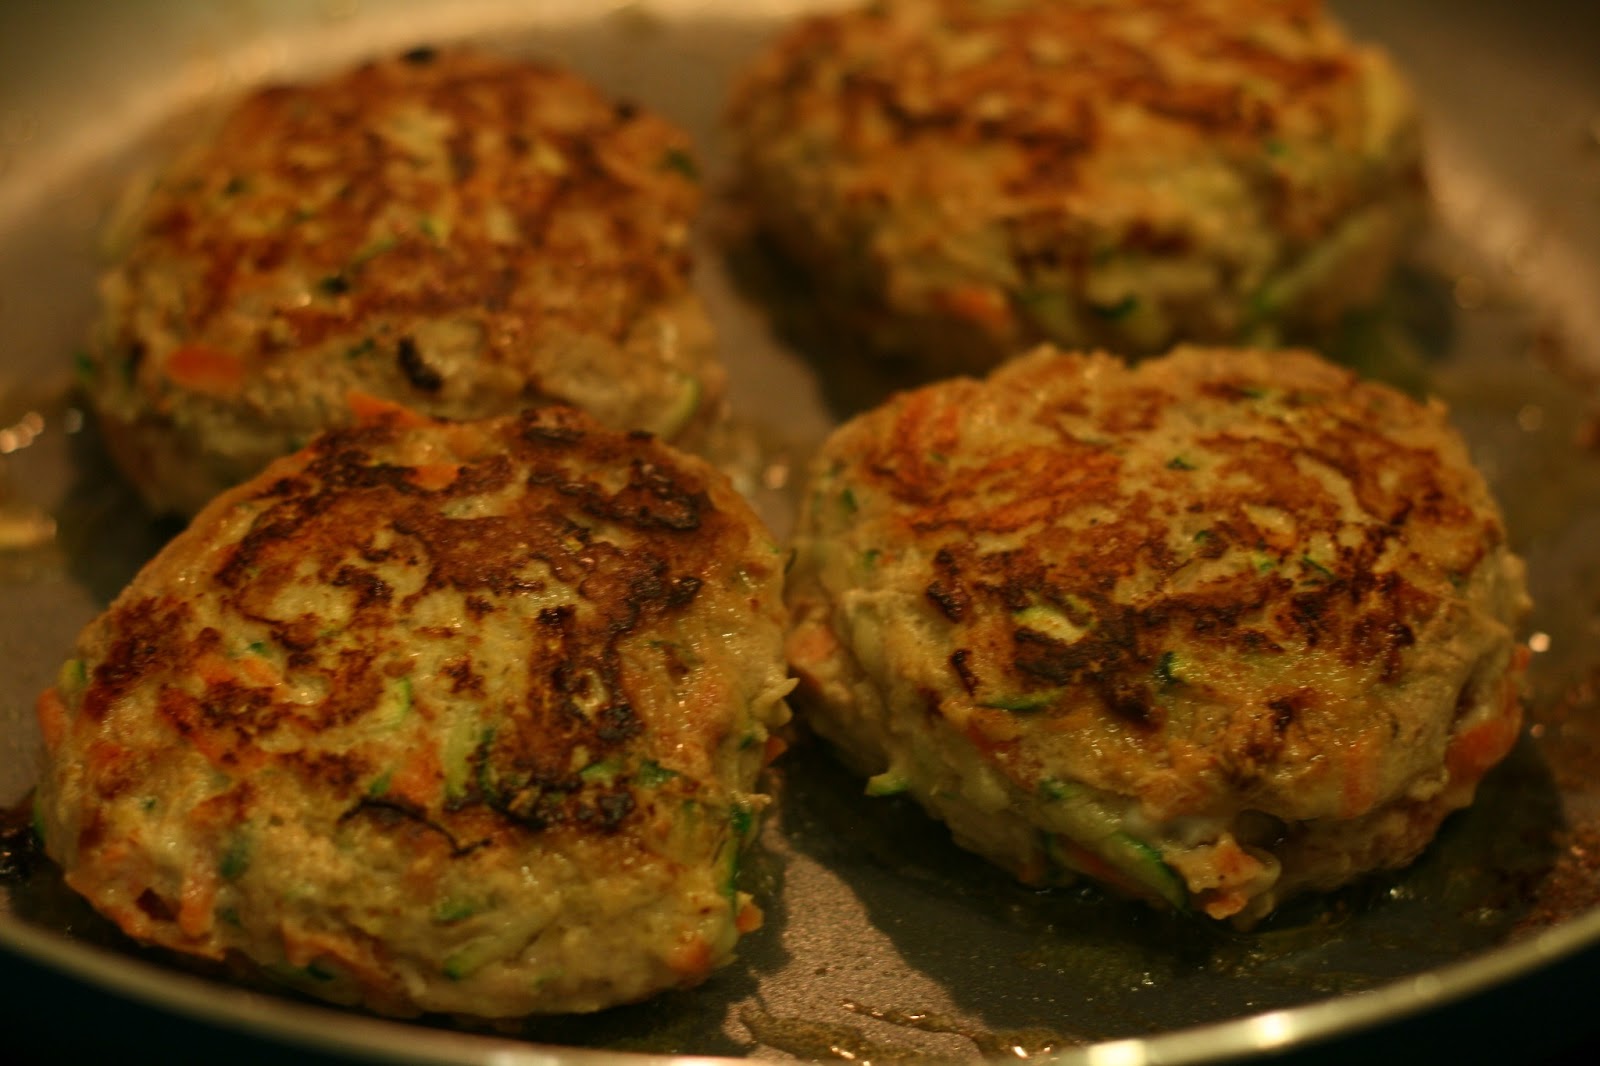
Seriously, who really thought that adding vegetables would keep ground turkey moist?! If you have some finicky eaters in your household, trust me they won't notice. Plus if you melt a slice of gouda on top and then stick it under the broiler like I did, then they really, won't even question what's in this heaven-sent burger.


Oh did I mention that this burger is only 300 calories!? GOD, I love burgers, like seriously, why do I love mac n cheese and burgers...the two most unhealthy American favorites, and I can eat them on any given day. This burger give me an excuse to eat burgers every week, like every Tuesday!?

Move over taco Tuesday, I'll have a turkey burger with my skinny margarita, thank you very much!

But seriously, I knew that adding some sauteed onions would liven up a turkey burger or at the very least, revive it from it's death due to overcooking (as I tend to overcook poultry more often than I like to admit!)

But adding water-logged vegetables like zucchini and carrots, your burger will retain its moisture and add body, making it nice and pump! These colorful veggies also add a bit of sweetness, which is better than nothing, since we all know turkey to be a rather bland bird.

A few dashes of spices here and there, slather on some of your favorite cheese or gourmet spread...and you've got the best turkey burger EVER! I cannot wait to put a little goat cheese on this tomorrow and eat it "naked" (no bun, silly...) for lunch!

Broiled Zucchini and Carrot Turkey Burger

Adapted from Real Simple Magazine

Ingredients: 
  • 1 lb. lean, ground turkey
  • 1 carrot, peeled and grated
  • 1 zucchini, grated
  • 2-3 cloves garlic, grated
  • 1 tsp. dried thyme
  • 1/2 tsp. salt
  • 1/2 tsp pepper
  • 1 egg
  • Olive oil
Directions:
  1. Grate carrot, zucchini and garlic into a large bowl. 
  2. Add in ground turkey, egg and spices. Mix well with your hands until the vegetables and turkey are incorporated well.
  3. Using your hands, form turkey patties and set aside.
  4. In a large skillet, heat 1 tablespoon of olive oil on medium heat. Carefully place patties in oil and let each side cooked for 4-5 minutes each until the middle of the patty gradually becomes less pink.


5.  Transfer patties to a baking sheet and place them under your broiler for 1 1/2 to 2 minutes.
6.  I added gouda slices in the last minute of broiling time to get it bubbly! Topped it off with some dijon, alf alfa sprouts and avocado. This recipe makes 4 large patties or 6 small patties. 

Wednesday, March 6, 2013

Let's Talk Soup: Introducing Kale's Other Brother, Swiss Chard

I was inspired to make this dish because I knew I had some Swiss Chard I had lying around and was looking for the right moment to make a soup with it. Let me tell you, foggy Monday's are by far the worst days (so are rainy Tuesdays!) When I know I have a busy week ahead, am already lacking the energy and on top of that, their ain't no sunshine in site, let's just say you can call me Deb...because I'm going to be a real downer. But a little rainbow chard goes a long way!


Since Kale is all the rage and literally, always out of stock, each time I visit the grocery store, I've been opting for it's lesser acknowledged, sibling of a dark green.

The rainbow chard really adds to the magical properties of this soup. I mean when you just need a little extra TLC (maybe for no particular reason), soup is the ultimate comfort food, without the guilt of something far more greasy. In just on bite you've got every flavor and ingredient asking for your taste buds attention. Soup isn't particularly sexy looking, nor is it sexy to eat, but it sure does get all the senses stimulated at once.

And for that, it seems pretty magical to me! But what makes this very recipe sing its praises, is the that it's well-balanced in all aspects. You've got protein with your lean meat (optional!) and beans. Then you've got your dark greens, carrots and other vegetables. A little bit of carbs, that go a long way. Not to mention, that the flavor profile stands out, because no one spice is over bearing. It's not too earthy or too spicy. The only thing I'd change is adding less of the whole wheat elbow macaroni pasta, as it will soak up much of the liquid making this final product more of a stew than soup.

But let me say that this soup hit the spot...hit the nail right on the head...and the best part? This entire meal came together in less than 30 minutes!

Rainbow Chard White Bean Pesto Soup


Ingredients:

  • 1 bunch, chopped  and washed rainbow swiss chard ( 1 bag of already washed and chopped chard)
  • 1 leek, washed and sliced
  • 1/2 yellow onion, diced
  • 2-3 medium sized carrots, sliced
  • 3 cloves of garlic, minced
  • 1 package of pre-cooked, turkey kielbasa sausage link, chopped  into quarters (totally optional if you are a vegetarian or vegan!) 
  • 1/4 cup, whole wheat elbow macaroni (optional)
  • 2 cans cannellini or white beans, drained but NOT rinsed (we want the starchy yumminess!)
  • 1 Tbs. fresh rosemary, chopped
  • 4 cups vegetable stock
  • 3 cups water
  • Salt and pepper to taste
  • Olive oil
  • 2 Tbs. of pesto (homemade or pre-made)
Directions:
  1. In a large pot or Dutch Oven, add about 1 Tbs. of olive oil and heat on medium. Add minced garlic, onions, onions and leeks. Season with salt and pepper. Sautee these until they are soft and translucent, about 6-7 minutes. 

   2.  Add in drained cannellini beans and cook for additional 3-4 minutes. OPTIONAL: I know many readers are veg or vegan, but if you are a meat lover like me, this is the time to add your cooked turkey sausage quarters!

 
  3.  Add in stock, water and pasta (optional!) bring the pot to boil. Once this is boiling, bring temperature down to a simmer for 10-15 minutes. 
 

  4.  Add chard, which will wilt in the heat. Then add fresh, chopped rosemary and stir in pesto.


  5.  Serve piping hot with a side of some crusty bread! YUM!


 This is a very large serving, perfect for lunch or dinner (or both!) for days and days after. But if you so happen to be serving this for one meal, I'd say it serves about 8-10 hungry urbanites :)


Stay dry in this San Francisco "winter"!