Showing posts with label chicken breast. Show all posts

Monday, February 25, 2013

The Underdog Dinner: Warm Salad

Before you go hating on salad for dinner, just know that their will be no soggy or wilted lettuce mentioned anywhere in the recipe. You've been forewarned.

On to better and brighter things. So I've definitely made pesto before, peppered with vibrant sundried tomatoes and almonds slivers. But this time, I opted for a more traditional basil pesto recipe. I have to admit...it was MOST delicious pesto I've ever made (maybe even better than the sundried tomato recipe!?) It's also thicker than the stuff you might get in the store because it's a tad more concentrated and certainly full of flavor!

I was inspired by my sister's friend that was telling about 21-day cleanse she was trying out. Unlike most fab diets, this one seemed to teach you how to really eat healthy, by listening to your body when you do and don't eat certain foods (i.e. more energy when I eat x,y,z!) And while I am totally against dieting, unless it's a lifestyle change and long-term commitment to a particular eating style (maybe impossible for me since I love burgers and the occasional Taco Bell), this cleanse actually striped away certain foods and then reintroduced them later, allowing your body rebuild a natural "portion control" mechanism and adjust to it.

Hmm...just wish I could remember the name of the diet. Oh well! At least I took away something positive from it!

Which leads me to this protein-powered, fiber-filled and gluten free meal! You can certainly make this vegetarian, but y'all know I love my chicken breast. Eat this at room temperature, or warm up leftovers for only a minute or so and...presto! INSTANT MEAL! So low key, just my style. 

Using an ingredient, such as pesto, is an added bonus because it's so versatile and can be repurposed in so many ways...not to mention it saves $$$!


And while I've been an, ahem, possible hater of quinoa, I'm perfecting the flavor and texture of my quinoa each and every time I make it! I mean isn't that the fun of cooking? Making something feel like your very own, impromptu or comfortable to make time and time again? Trust me, people can taste when you make a meal with a full heart and soul and it makes all the difference when cooking. 


Soulful, yet healthy. Simple, yet diverse. A perfect meal for any day. Enjoy!

Warm Chicken Pesto Quinoa Salad


Kneading Sass original 

Ingredients: 
  • 2 or 3 large chicken breasts, cooked and cubed
  • 4 heaping Tbl. basil pesto
  • 1 cup quinoa, cooked to package instructions
  • 2 cups chicken broth, for cooking quinoa
  • 1 red bell pepper, diced
  • 1 red onion, raw and diced OR 1 white onion, diced and cooked 
  • 1/2 cup mushrooms, sliced 
  • handful of crumbled fat free feta, use additional as garnish
  • Pine nuts as a garnish
Basil Pesto:
  • 1 bunch of fresh basil, stems cut off and leaves torn
  • 2 tsp. pine nuts, toasted lightly 
  • 3 cloves of garlic, minced
  • Olive oil
  • Salt and pepper to taste
  • 3 tsp. grated Parmesan cheese
Directions: 
  1. To make pesto: Literally, I mean literally, throw all the ingredients into the food processor! First, add the garlic (to make sure it gets minced well!), then add your basil and stream in your olive oil, as you pulse the ingredients in the food processor. It will slowly become a green paste, which is perfect! Add salt and pepper to taste. Add a sprinkling of cheese. Toasted pine nuts in a pan for a 2-3 minutes, on medium heat, until slightly browned and fragrant. Dump those into the food processor too and pulse away! Viola! Pesto in a flash :) 
Pulse, pulse, pulse!
    2.  Cook quinoa to package instructions. Most packages say use water, I add a little flavor with chicken broth instead. I simmer my quinoa for the full 15 minutes to ensure that it's fluffy and fully cooked.
   
    3.  Because I used white onions, I sautéed them with olive oil and threw in the mushrooms as peppers as well, just until the onions were a little translucent. I still wanted those peppers to be sweet in crunchy! If you have red onion, just throw them into the cooked quinoa, raw, along with the peppers and mushrooms.


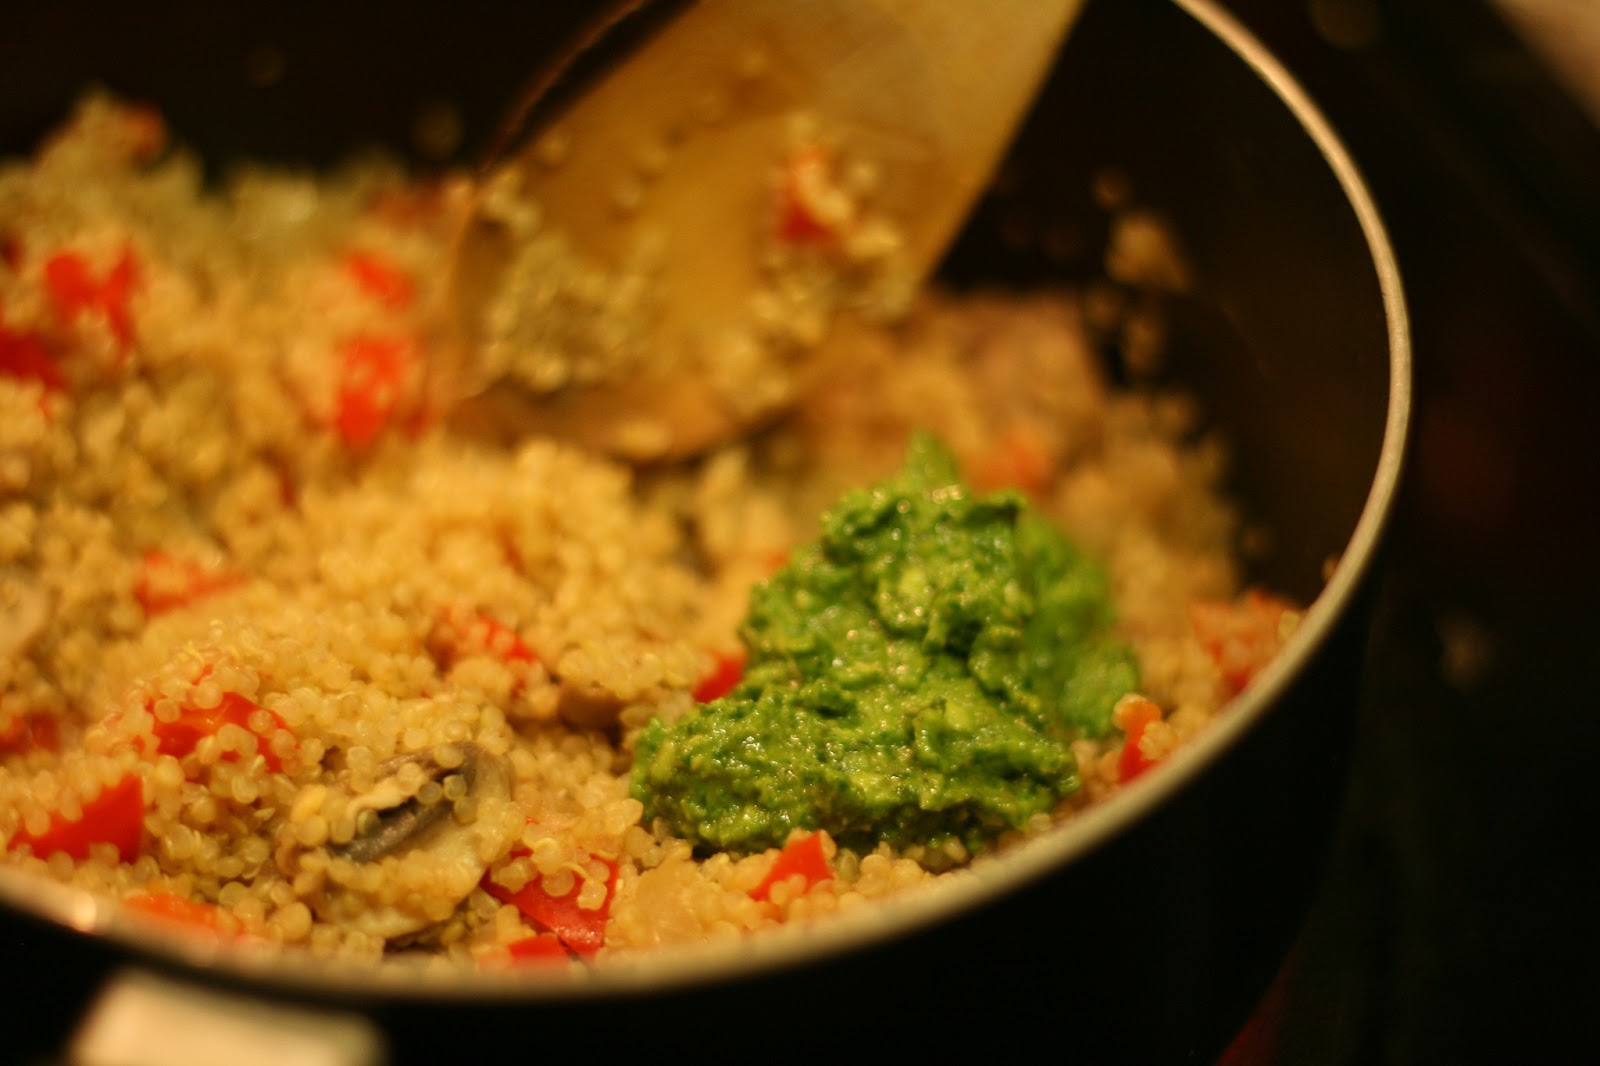
   4.  Add in that heaping teaspoons of pesto
.
   5.  Then add in crumbled feta and mix. 

   6.  Top with additional feta and pine nuts! (optional) Serve warm or room temperature.


Monday, February 11, 2013

The Mediterranean, It Was In Your Oven The Whole Time

I'm sure you've heard of a staycation? Well, consider this meal a serious, breath of fresh air in terms of your sub par, bland and overused, chicken breast meal variations. Oh and did I mention that you can literally throw this meal together in one dish! Insanely easy clean up. 


Light, refreshing, delicious to the very last bite, this Mediterranean-inspired chicken dish is a meal sure to satisfy foodies with complex flavor palates, but also, easy and impressive for a date night at home, and perfect for any working gal/guy whose not too keen in prepping before meals. 

So this is basically the PERFECT recipe, ever. 


Four ingredients and 30-40 minutes later, you taste buds will be in R & R mode.

My muse for this dish was a recipe I found on Foodgawker for a Mediterranean bruschetta...which sounded amazing, but seriously, how often do I host a get together where I need appetizers? Holidays are long gone and with life ramping up to it's "normal" hyperactive pace, a one pan meal, with less than five ingredients is always ideal. 

I was intrigued and delighted by the acidity in this dish as well as the use of goat cheese (duh!), and instead of spreading this lovely concoction on a hunk of hearty bread, I decided to make this into a full blown meal by adding some chicken breast and eliminating the bread all together. Served with a side of couscous (to soak up all the juices from the cooked artichokes!), but the starch is totally optional.

Mediterranean Chicken with Israeli Couscous


Kneading Sass original 

Ingredients:  
  • 6 pieces of thinly-cut chicken breasts, or 10-12 breast tenders
  • 1 can artichoke hearts, drained and coarsely chopped
  • half a jar of pitted kalamata olives, sliced in halves (preferably NOT in oil, but in its own brine)
  • 1/2 cup cherry tomatoes, sliced
  • 4 oz. crumbed goat cheese 
  • 1/2 tsp dried oregano
  • 1 tsp Italian seasoning
  • Olive oil
  • Pepper and garlic powder to taste
For Israeli Couscous (optional): 
  • 1 package of Israeli couscous, cooked to package instructions (found this at TJ's!)
  • 1 3/4 cups of chicken stock (replacing water in couscous)
  • 1/4 cup pine nuts, toasted
  • 2-3 large basil leaves, coarsely chopped
  • 1/4 white onion, diced
  • 1 red bell pepper, diced
  • 1/2 cup white mushroom, sliced)
  • 1/4 cup golden raisins (optional)
  • Pepper to taste
  • Olive oil
Directions: 
  1.  Preheat oven to 375 degrees. In a large casserole dish (roughly 9 X 13 sized) places your chicken breasts or tenders in an even layer. Season pepper and garlic powder on both sides. Drizzle about 1 tsp of olive oil on top of chicken. 
  2. Right into the casserole dish (awesome right!?), add drained artichokes that have been coarsely chopped. Make sure to layer evenly over chicken. 

     4.  Add layer of sliced (in half), kalamata olives. Note: olives in oil might make this dish a little too oily, so it's safer to use olives submerged in their own brine. If you do, accidentally (like me!), buy olives in oil, no need to drizzle olive oil on your chicken.
     5.  Add even layer of cherry tomato halves.
     6. Add Italian seasoning and oregano spice to crumbled goat cheese. Then even layer goat cheese atop artichoke, olive and tomato layers. 

       7.  Bake for about 30-40 minutes, until chicken is fully cooked through and most of the liquid has been absorbed. 
       8.  For the last 3-5 minutes I changed the temperature to broil, just to brown the goat cheese topping and evaporate some of the liquid.
       9.  Serve immediately with a salad or starch (like couscous or orzo!) This dish serves 6!


For Couscous:
  1. Cook Israeli couscous to package instructions in saucepan. I substituted water with chicken broth for added flavor.
  2. While couscous is cooking. Saute onions, red pepper and mushrooms with a bit of olive oil on medium low heat until the are soft and translucent. Set aside. 
  3. Toast pine nuts on a dry pan (no oil), on medium heat until they brown just a little and are fragrant (about 3-4 minutes). 
  4. Chop basil and set aside. 
  5. Once couscous is cooked, remove from heat and add sauteed vegetables, pine nuts and basil right into the saucepan. 
  6. Here's where I'd usually add the raisins, but I didn't have any on hand this time so I omitted it! But they are, seriously, delicious and plump up nicely in the warm couscous.
  7. Add a liberal amount of pepper and mix well. 
  8. Serve immediately! 


Tuesday, January 8, 2013

How to Make Qunioa Taste Good

Everyone in San Francisco raves about quinoa, coveting its nutritious qualities and the novelty of its replacement to complex starches like pasta and rice. I felt like I gave quinoa a fair shot a few months ago, after several attempts of preparing it in different ways. I found it to be bland and was not a fan of its texture; quinoa was on my "sorry, i just can't" list, along with mayonnaise and kombucha (YUCK! Sorry...)


But then I found that baking and pan frying quinoa gives it this wonderful, crispy texture that reminds me of that lovely, big crunch found in Panko breadcrumbs and that delicate, crust you might find when pan frying slices of polenta. FINALLY! Quinoa finds some redemption with my palate.


I love the crispy texture of the pan fry, but the oven bake is pretty amazing as well!
Quinoa reminds me a of a small grain, sort of like a lentil, but with the potential of having a texture that can be crispy and crunchy, when cooked right. After reading many recipes that use quinoa as a binding agent, I was inspired by several bloggers that used quinoa to make burgers!

Yes, burgers, my second favorite thing to eat, next to brunch, of course :).

Sidenote...I have this odd, sweet spot for buffalo chicken anything...it must be the tangy/spicy combo. Otherwise, good luck spotting me eat a chicken burger!

Anyways, after scouring in the Internet, I found an appetizer recipe made of buffalo chicken and quinoa and turned it into an insanely, flavorful and crunchy buffalo chicken, gorgonzola and quinoa burger patty. YUM! I took something I once despised and married it with the sassy flavors of buffalo chicken. Plus, if you eat quinoa on the reg, then this is a excellent recipe to use your leftover quinoa in!

A nice drizzle of sauce going in! Careful, because too much will make your patties fall apart.
So, yeah, you're welcome. Now you can fit in with all your San Francisco hipster friends, that may or may not, actually be allergic to gluten. Go ahead and bask in the glory of quinoa...covered in buffalo sauce of course!

Crispy Buffalo Chicken, Quinoa and Gorgonzola Burgers 


Ingredients: 
  • 2 chicken breasts, cooked and shredded 
  • 1/2 cup quinoa
  • 1 cup low sodium chicken broth
  • 1/4 cup gorgonzola or blue cheese, crumbled
  • 1/2 cup shredded cheddar cheese
  • 1/4 cup white onion, diced 
  • 1/4 cup buffalo sauce 
  • 1 egg
  • Salt and pepper to taste
  • Vegetable oil (if you decide to pan fry) or cooking spray (if you bake these)
Directions: 

  1. Season and cook your chicken breasts; I like to bake mine in the oven. Bake them at 350 degrees for about 35-40 minutes, until its no longer pink inside and cuts through clean. I wrap my chicken in foil like a present or wrapped piece of candy (twisting both ends of the foil so that none of the liquid escapes) and place it on a cookie sheet. 
  2. Cook 1/2 cup of quinoa to package instructions. I substituted the 1 cup of water with 1 cup of chicken broth instead, this will give the quinoa much more flavor! Quinoa takes about 15 minutes to cook, you'll know when it's done because it will be tender and will have absorbed all of the broth. 
  3. Once quinoa is done cooking, set aside, and let it cool until cool enough to hand with your hands. 
  4. Once chicken is cooked, place it on a cutting board or plate and start too pull apart chicken with two forks, shredding it into pieces. 
  5. Combine the chicken and cooled, quinoa into a mixing bowl with crumbled gorgonzola, shredded cheddar cheese, buffalo sauce, egg, and onion. Mix well. 
  6. With your hands, ball up mixture (about 2 heaping teaspoons worth) and then form into patties. Be sure to flatten them so that it will cook evenly.
  7. Now you can either bake or pan fry these. 
  8. To pan fry: In a shallow pan, heat about 1 inch of vegetable oil on medium heat. Carefully drop patties into hot oil and cook for 3-4 minutes, on each side. It should be crispy, but not burnt. Transfer to a plate lined with paper towel to let any excess oil drain. 
  9. To bake: Preheat oven to 350 degrees and spray a cookie sheet with cooking oil. Place patties on the sheet and in the oven for 10-15 minutes. You want both the bottom and top to be crispy, but be careful not to burn! 
  10. Enjoy these on a gluten free (or regular bun) with all your favorite condiments! 
Sizzle and salivate.
Note: Mine is stacked high on a poppy seed bun (not gluten free) with dijon mustard, spinach, and tomato slices! This recipes serves 4 hungry people. And yes, one burger (bun and all the fixings) is only 305 calories!

Tuesday, November 13, 2012

Go Sassy or Go Home!

You may have noticed a few new changes to Kneading Sass. I'm finally getting around to using my logo, wherever I can, including as the header for this blog! I've also, kindly spammed many of you to like, share and follow my Facebook page found here. (See how I am shamelessly promoting it again!) An just in case you are curious, my Twitter handle is @KneadingSass.

Now that we've got business out of the way...it's time to talk about food... and chicken breast to be exact! Chicken is a very versatile meat and chicken breast can be made a million and one ways. And while that's all fine and dandy, I am notorious for overcooking my chicken. It's pretty awful and I am a bit ashamed to admit it but, frankly, I know many cooking enthusiasts  that are fearful of cooking, chicken (compared to other meats) simply because they are afraid of serving something a little too pink, a tad undercooked...  and well, chicken is one of few meats, that CANNOT be served raw! What a lose/lose, right? Except there is hope!

Breading
your chicken is a tried and true way for locking in the natural moisture and juices that make chicken tender and delicious. Let's not forget it creates a wonderful texture and crunch that can really give a little umph to the everyday, boring piece of chicken breast. Now, I know people don't usually equate breading with healthy eating, but using Panko breadcrumbs is a more figure friendly way to bread a sub par piece of chicken.

Panko breadcrumbs are not only less fattening than regular breadcrumbs, but they are much larger than your normal breadcrumbs. You'll need a scant amount of Panko to cover the same amount of surface area as compared to the regular stuff (very scientific sounding I know!) You can also lightly toast your breadcrumbs in a skillet, to bring out its buttery flavor, sans using any butter, as well as add whatever spices to the Panko, to give your chicken even more flavor.

See how I turned that into a win/win?

Goat Cheese, Mozzarella, Olive Stuffed Panko Chicken Breast


So crispy, so delicious
Kneading Sass original 

Ingredients:
  • 1 chicken breasts partially halved
  • 2 oz. favorite goat cheese, about half of a standard-sized log of goat cheese ( I used Cypress Lavender and Honey, it's my favorite herbed goat cheese)
  • 2 pieces, sliced, then halved, mozzarella (or use 2 small, handfuls of shredded mozzarella) 
  • 1 Tb. chopped olives
  • 1 egg white, lightly beaten
  • 1/2 cup Panko breadcrumbs, seasoned with: dried oregano, dried basil, garlic powder, pepper, Italian seasoning and fresh, grated Parmesan, to taste
Directions: 
  1. Preheat over to 400 degrees. Spray cookie sheet with Pam, any other cooking spray, to prevent chicken from sticking to the sheet. 
  2. Half chicken breasts, make a deeps slit, but not cutting in half all the way through. Layer sliced mozzarella, crumble desired amount of goat cheese and sliced olives. This order prevents any of the filling from falling out. 
  3. In a shallow dish lightly beat eggs whites. In another shallow dish, mix Panko breadcrumbs and herbs. 
  4. Carefully coat chicken in egg white mixture. Using a pastry brush to egg wash the top of the chicken breast would be easiest, instead of turning over stuffed chicken (and possibly losing all the good stuff inside!) 
  5. Place chicken breast in the dish with breadcrumbs, using your hands or a spoon to evenly coat the top of the chicken as well. 
  6. Place in the oven for about 40 minutes, or until the internal temperature is 170 degrees or no longer pink. 
  7. This recipe serves 2, but can easily be scaled up to serve more people. I served this dish with a side of garlicky, cooked spinach.