Showing posts with label dinner. Show all posts

Wednesday, July 9, 2014

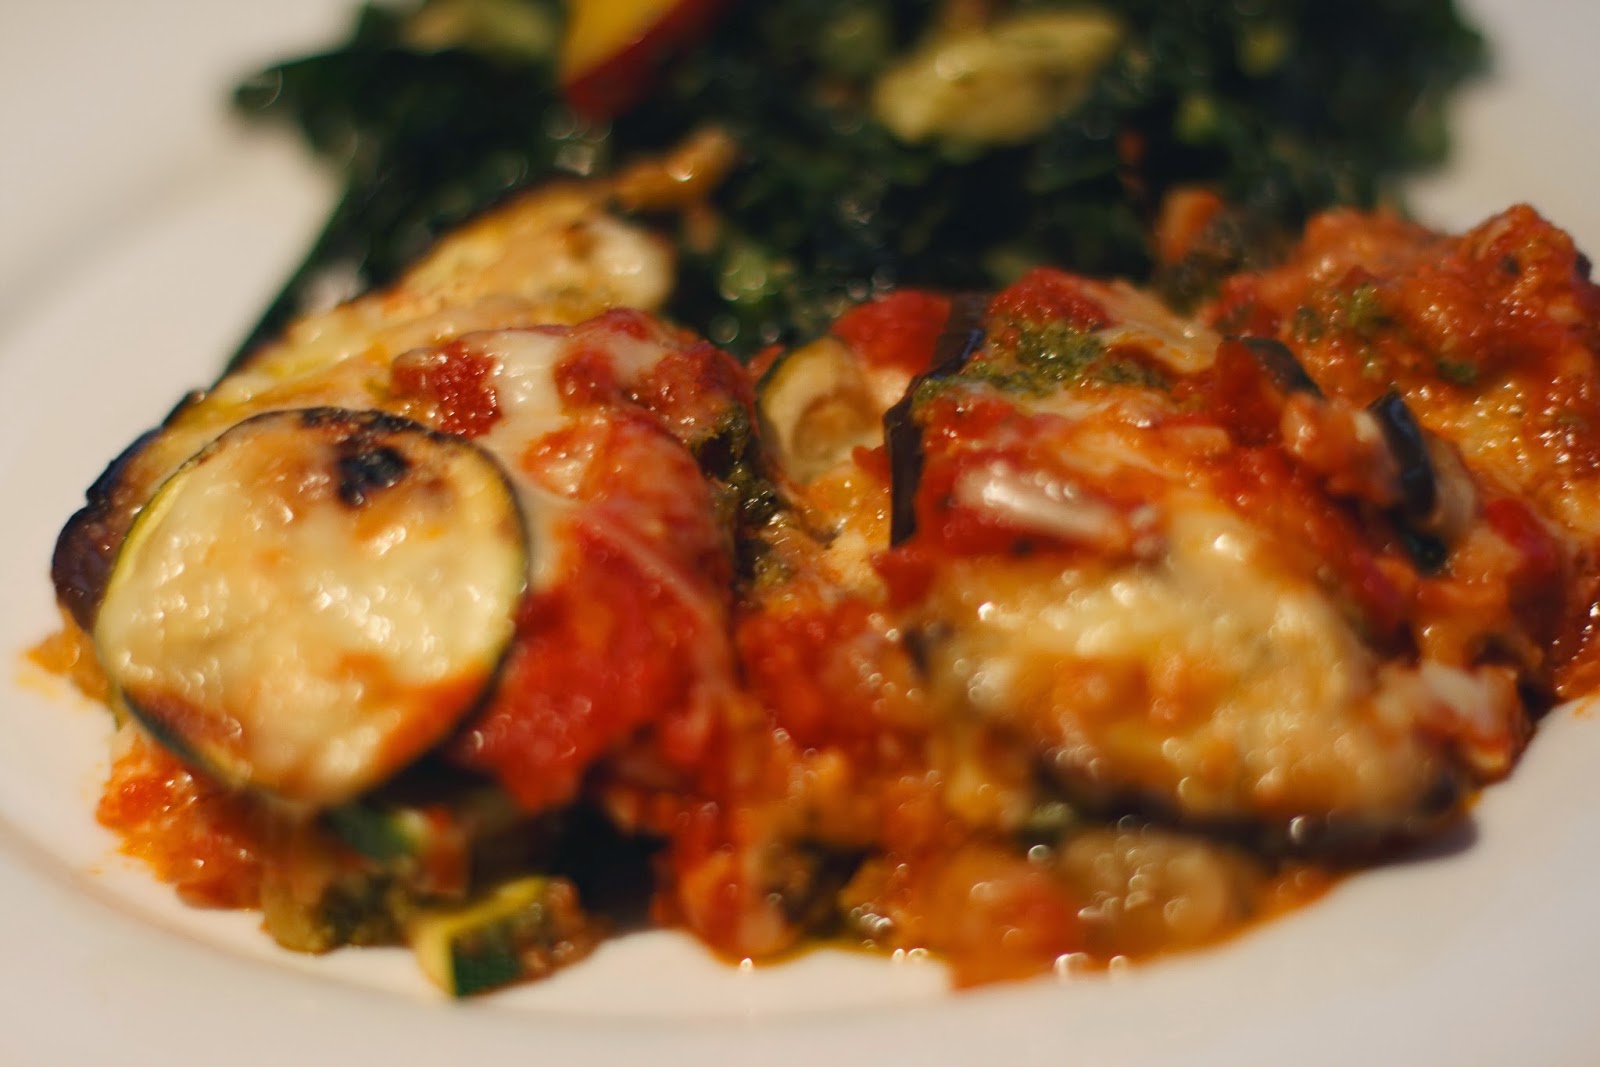
Casseroles are Delicious Again: A New Kind of Eggplant Parm

Feeding a group of people, or just two (or even one!) can feel like a lot of work. Making something in mass, like a casserole or a bake, is not only economical, but worth all the prep time and effort of making something from scratch! It's easier to buy a bag of onions or chop a lot of garlic for something, rather than one pod, one stalk of this or that...am I right? Plus eating and making meals should be social! If you are cooking for one or two... know that I love cooking meals in bulk and ahead of time, so I am not famished after work or working out (or after an evening of happy hour!)


But making something like casserole seems very 1950's and a little to retro, maybe....NOT! Take something like eggplant parmesan...a fairly hearty dish, easy to make for many, or save all for yourself to devour over a few different meals. It can be labor intensive what with breading the eggplant, then baking it, then layering ingredients and then baking again. Take the shortcuts where you need them! The end result will be delicious no matter what
Add whatever extra veggies or ground meat you might have in your fridge, literally the kitchen sink if you want!

But really this baked eggplant and zucchini casserole is a no fuss meal. Make it the night before and then pop it in the oven or serve it to gaggle of pals, I've modified this otherwise very cheesy and rich dish to use minimal amounts of dairy and carbs, replacing these vices with loads of veggies.

I used my homemade, VEGAN pesto recipe (seriously, it's the BEST), but you can always use something store bought instead. Making pesto is somewhat of a bi-weekly ritual I have, but that's just me!

This meal was lovely with a crisp white wine. Enjoy!


Eggplant and Zucchini Pesto Casserole 


Ingredients: 

  • 1 large eggplant, sliced into 1/4-inch rounds
  • 2 zucchinis, cut into rounds
  • Your favorite tomato sauce, I love Arribiata because it's spicy!
  • 2 cloves garlic, minced
  • 1 cup low fat mozzarella, shredded 
  • 1/2 cup parmesan cheese, shredded
  • Homemade pesto (or store bought!)
  • 1 cup Panko bread crumbs
  • 1 Tbl. live oil
  • Cooking spray
  • Salt and pepper to taste
Directions:

1. Preheat your oven to 425. Cut your eggplant in rounds and zucchinis. 


2. Using a grill pan, George Foreman, or panini press (that's what I used!), spray your hot surface with cooking oil. Place your veggies on the hot surface and let them get a little brown and cooked. They do not need to be cooked all the way, as they will continue to soften in the oven later. Using a grill or press is INCREDIBLY FAST. Like 5 minutes fast. 


3. Set aside your grilled veggies on a plate to layer later.


4. In a saucepan, add olive oil on medium heat; add garlic once pan is hot. Cook for 30 seconds until fragrant. Add your favorite sauce.

5. Let your sauce reduce to simmer. 

6. Begin layering your dish! Start with a thin layer of sauce, add eggplant slices, cheeses, a handful of breadcrumbs and a few spoons of pesto. Do another layer of this but with zucchini, then alternate. I had about 2 layers of eggplant and zucchini, for a total of 4 layers. 


7. Bake, uncovered, for about 15 minutes or until cheese is melted. 


8. Cool for about 5 minutes before cutting into square slices. Served this dish with a kale, pesto peach salad (recipe to follow!) and some vino. Serves about 5 hungry people. 


Thursday, March 6, 2014

Tomato Basil Pesto Soup

The sass is back! Ten months later and making a big splash with soup!

It's a been a very long time since I have shared my love for food, cooking and sharing my passion for preparing meals! For 10 months I've been dragging my feet, with a move to a new apartment, adopting a kitten ( hello Umber!) and repairing a camera that took way too long to finally fix, am back in full sass! Thanks to all of you who welcomed me back with open arms, it was tough after being gone for so long!


In my 10 month hiatus, I have done and A LOT and learned A LOT about:
-veganism
-dairy-free cooking
-Paleo
-raw food

While some of these lifestyles, and I call them that because they truly define the ways you approach food in and out of the kitchen, are not for me 100% of the time, they all have very valuable characteristics and principles that celebrate food as something to be enjoyed and as a strong force of nutrition as well as energy. I've picked up on a number of tips and tricks that cut corners here and there --they have really helped make prep time, easier, faster and more convenient for home cooks with limited time, without ingredient fatigue.


Homemade vegan pesto is the best. Toasted cashews give it that creamy texture without the cheese!
I have been cooking up a storm in my new place, mostly perfecting existing recipes and also working with things I have at home or whatever is in season (or inexpensive!) at the grocery store. Not only have I been buying more produce, but I've been playing around with substituting starches with hearty veggies. Turning them into pastas and rice, topping them off with tons of protein!

My number one fan, Umber the kitten!
As so this left me thinking  long and hard about my comeback to Kneading Sass; I knew I wanted to make a splash (in truly, sassy fashion!) but I did not want to make anything new or complicated. Simple is my mantra these days. No more than 5 main ingredients --- all of which are easy to find and versatile for everyday cooking. I've also been cooking for the entire work week, saving a lot of money and calories, by making at least two different meals and switching off days to give myself some variety. Keeping all these culinary experiences (some failures, some successes) in mind, I decided to reintroduce myself to Kneading Sass with some soup. The perfect cure for any ailment!

Soup is AWESOME, and I truly believe this for a number of reasons:
- Soup can be prepared in large quantities (and ahead of time!)
- No need to eat it all at once, or even share your soup, freeze it for at least a month!
- Most soups have a base of garlic and onion (sometimes carrot and celery), always got that on hand!
- Not using the exact amount of any particular ingredient won't ruin your soup! (there are plenty of ways to hide mistakes in soup)


Here is lovely, San Francisco, we've finally got our dose of winter...and by winter I mean a few days of rain, cloudy weather and chilly nights. It's the perfect setting for soup

This recipe is gluten free (yay!) and can be made vegan (double yay!). Sip and slurp on this sassy soup..oh and let me know what you think!


Tomato Basil Pesto Soup


Ingredients:
  • 3 can of diced tomatoes (do not discard these lovely juices!)
  • 3 Tbl. olive oil
  • 1 small white onion, diced
  • 5 cloves of garlic, minced
  • 3 cups vegetable or chicken stock
  • 3 heaping Tbl. pesto (homemade or store bought) Alternatively, you can use about 1/2 cup of fresh basil leaves roughly chopped instead
  • 1/2 tsp dried thyme
  • 2 Tbl. agave nectar (or sugar)
  • 1 bay leaf
  • Salt and pepper to taste
  • 3/4 cups of milk + 2 Tbl unsalted butter, melted (combine these two to make half and half-like consistency), optional
Directions:


1. In a large pot, saute diced onions on medium heat, about 5 minutes until they are transparent. Add in your minced garlic and cook for one minute, until fragrant.


2. Add in 3 cans of diced tomatoes, stock, agave nectar thyme, salt, pepper and bay leaf. Stir in pesto. 

3. Bring your soup to a boil, once you see it bubbling away, bring the heat down to a simmer and cover. Let the soup simmer, while covered, for 30 minutes. Don't forget to remove your bay leaf once you are done simmering!


4. Using a blender (LOVE my Ninja blender), or blender stick, you can emulsify your soup making it smoother in texture.
5. Using a ladle spoon, slowly add all your soup mixture into you blender. If you are using an immersion stick then be sure to cool your soup mixture for a few minutes, it is possible that some soup will splatter, so it's best you save yourself from a burner! Or just use a blender, honestly, it is
MUCH safer.

6. Blend soup for about 30 seconds, until smooth. Add in milk mixture and blend again for another 30 seconds.
7. Serve piping hot with an extra teaspoon of pesto on top. Goes great with a gooey grilled cheese sandwich or toast!


For storage, store cooled soup in an air tight container. Without the dairy your soup should be good in your fridge for about 1 and half weeks. With our without dairy, your soup should freeze well for 1-3 months.

Serving size: 6-8 soup lovers!

Monday, February 11, 2013

The Mediterranean, It Was In Your Oven The Whole Time

I'm sure you've heard of a staycation? Well, consider this meal a serious, breath of fresh air in terms of your sub par, bland and overused, chicken breast meal variations. Oh and did I mention that you can literally throw this meal together in one dish! Insanely easy clean up. 


Light, refreshing, delicious to the very last bite, this Mediterranean-inspired chicken dish is a meal sure to satisfy foodies with complex flavor palates, but also, easy and impressive for a date night at home, and perfect for any working gal/guy whose not too keen in prepping before meals. 

So this is basically the PERFECT recipe, ever. 


Four ingredients and 30-40 minutes later, you taste buds will be in R & R mode.

My muse for this dish was a recipe I found on Foodgawker for a Mediterranean bruschetta...which sounded amazing, but seriously, how often do I host a get together where I need appetizers? Holidays are long gone and with life ramping up to it's "normal" hyperactive pace, a one pan meal, with less than five ingredients is always ideal. 

I was intrigued and delighted by the acidity in this dish as well as the use of goat cheese (duh!), and instead of spreading this lovely concoction on a hunk of hearty bread, I decided to make this into a full blown meal by adding some chicken breast and eliminating the bread all together. Served with a side of couscous (to soak up all the juices from the cooked artichokes!), but the starch is totally optional.

Mediterranean Chicken with Israeli Couscous


Kneading Sass original 

Ingredients:  
  • 6 pieces of thinly-cut chicken breasts, or 10-12 breast tenders
  • 1 can artichoke hearts, drained and coarsely chopped
  • half a jar of pitted kalamata olives, sliced in halves (preferably NOT in oil, but in its own brine)
  • 1/2 cup cherry tomatoes, sliced
  • 4 oz. crumbed goat cheese 
  • 1/2 tsp dried oregano
  • 1 tsp Italian seasoning
  • Olive oil
  • Pepper and garlic powder to taste
For Israeli Couscous (optional): 
  • 1 package of Israeli couscous, cooked to package instructions (found this at TJ's!)
  • 1 3/4 cups of chicken stock (replacing water in couscous)
  • 1/4 cup pine nuts, toasted
  • 2-3 large basil leaves, coarsely chopped
  • 1/4 white onion, diced
  • 1 red bell pepper, diced
  • 1/2 cup white mushroom, sliced)
  • 1/4 cup golden raisins (optional)
  • Pepper to taste
  • Olive oil
Directions: 
  1.  Preheat oven to 375 degrees. In a large casserole dish (roughly 9 X 13 sized) places your chicken breasts or tenders in an even layer. Season pepper and garlic powder on both sides. Drizzle about 1 tsp of olive oil on top of chicken. 
  2. Right into the casserole dish (awesome right!?), add drained artichokes that have been coarsely chopped. Make sure to layer evenly over chicken. 

     4.  Add layer of sliced (in half), kalamata olives. Note: olives in oil might make this dish a little too oily, so it's safer to use olives submerged in their own brine. If you do, accidentally (like me!), buy olives in oil, no need to drizzle olive oil on your chicken.
     5.  Add even layer of cherry tomato halves.
     6. Add Italian seasoning and oregano spice to crumbled goat cheese. Then even layer goat cheese atop artichoke, olive and tomato layers. 

       7.  Bake for about 30-40 minutes, until chicken is fully cooked through and most of the liquid has been absorbed. 
       8.  For the last 3-5 minutes I changed the temperature to broil, just to brown the goat cheese topping and evaporate some of the liquid.
       9.  Serve immediately with a salad or starch (like couscous or orzo!) This dish serves 6!


For Couscous:
  1. Cook Israeli couscous to package instructions in saucepan. I substituted water with chicken broth for added flavor.
  2. While couscous is cooking. Saute onions, red pepper and mushrooms with a bit of olive oil on medium low heat until the are soft and translucent. Set aside. 
  3. Toast pine nuts on a dry pan (no oil), on medium heat until they brown just a little and are fragrant (about 3-4 minutes). 
  4. Chop basil and set aside. 
  5. Once couscous is cooked, remove from heat and add sauteed vegetables, pine nuts and basil right into the saucepan. 
  6. Here's where I'd usually add the raisins, but I didn't have any on hand this time so I omitted it! But they are, seriously, delicious and plump up nicely in the warm couscous.
  7. Add a liberal amount of pepper and mix well. 
  8. Serve immediately! 


Tuesday, July 3, 2012

A cure for the case of the Mondays

Well, it's true, I have yet to post anything about cupcakes, although I swear, they are my one and true love when it comes to baking. The thing about cupcakes is that it can be a long, drawn-out process, especially when you are low on time and need specific in...and well let's face it seems like it takes forever to wait for them to cool and then frost ( I always get too excited and want to frost earlier than I should!) But I digress. Today, I had a serious case of the Mondays. What with the 4th of July coming up, half days, and the promise of sunshine and mildly, warm weather in San Francisco, I just couldn't seem to think about anything but baking and cooking! There is nothing like being in the kitchen to calm restlessness and disorder with some chopping, stirring and stuffing. Today I told Monday to get the heck out of my kitchen and to save its mood-killing self for next Monday!  It all started with some left over ground beef from a previous burger binge. Of course, I consulted my fav go-to, Foodgawker, for some ambitious guidance to the perfect post-Monday, post-workout meal. I came back with a savory fare that didn't seem overly-hearty and with the just the right amount of comfort (making my Monday all the more better!) 


Note: The recipe I used below calls for sundried tomatoes; I didn't have these on hand so, I left them out. The shells were divine without them! Since I didn't really follow the recipe to the tee (using the ingredients as base), I've decided to give this dish its own name. Hope I don't run into any copyright infringements...just kidding. (Not really!)


Ground Beef, Spinach, Ricotta Stuffed Shells (By The Bay)


Naked without the parm,  but looking good before going into the oven.
The final product--a Monday night miracle.
adapted from Cookin' Canuck


Ingredients:
  • 8 oz. large pasta shells
Filling:
  • 2 tsp olive oil
  • 1/2 of a yellow onion, diced 
  • 2 cloves garlic, minced (or 1/2 tsp of crushed garlic from the jar)
  • 1 lb or 1/2 lb lean ground beef
  • 1 1/2 cups (packed) roughly chopped fresh spinach
  • a few heaping teaspoons of low fat ricotta cheese 
  • 1/2 tsp dried chili flakes
  • garlic salt (to taste)
  • ground black pepper (to taste)
  • 1 jar of your favorite tomato sauce
  • a handful of Parmesan cheese
Directions:
Bring a large pot of salted water to a boil. Add pasta shells and cook until just tender. Add a bit of olive oil to the boiling water to prevent the shells from sticking. 


For the filling, heat olive oil in a large frying pan set over medium heat. Add onions and saute until soft, 4 to 5 minutes. Add garlic and saute for additional 30 seconds.


Turn up the heat to medium-high. Add the ground beef and cook, breaking up with wooden spoon, until beef is cooked through. 


Transfer ground beef mixture to a large bowl. Stir in spinach and ricotta cheese until combined.

Season with dry chili flakes, salt and pepper to taste.


Fill each shell with 2 tablespoons of the beef mixture, or until the shells looks well stuffed.


Prepare a 9- by 13-inch baking pan by spreading even tomato sauce to coat the bottom. Arrange pasta shells, opening-side up, in the pan. Spread additional  cups tomato sauce on top, and sprinkle with grated Parmesan cheese.


Cover with foil and bake for 20 minutes. Remove foil and bake for additional 5 minutes, or until cheese is melted. Remove from oven and let cool for 10 minutes before serving.
Delicious with a salad, some veggies, or on it's own!